Leyland Fg Photo No 9 Of 81 Taken In Australia
Find inspiration for Leyland Fg Photo No 9 Of 81 Taken In Australia with our image finder website, Leyland Fg Photo No 9 Of 81 Taken In Australia is one of the most popular images and photo galleries in Leyland Fg Photo No 9 Of 81 Taken In Australia Gallery, Leyland Fg Photo No 9 Of 81 Taken In Australia Picture are available in collection of high-quality images and discover endless ideas for your living spaces, You will be able to watch high quality photo galleries Leyland Fg Photo No 9 Of 81 Taken In Australia.
aiartphotoz.com is free images/photos finder and fully automatic search engine, No Images files are hosted on our server, All links and images displayed on our site are automatically indexed by our crawlers, We only help to make it easier for visitors to find a free wallpaper, background Photos, Design Collection, Home Decor and Interior Design photos in some search engines. aiartphotoz.com is not responsible for third party website content. If this picture is your intelectual property (copyright infringement) or child pornography / immature images, please send email to aiophotoz[at]gmail.com for abuse. We will follow up your report/abuse within 24 hours.
Related Images of Leyland Fg Photo No 9 Of 81 Taken In Australia

Leyland Fg Photo No 9 Of 81 Taken In Australia
Leyland Fg Photo No 9 Of 81 Taken In Australia
600×450
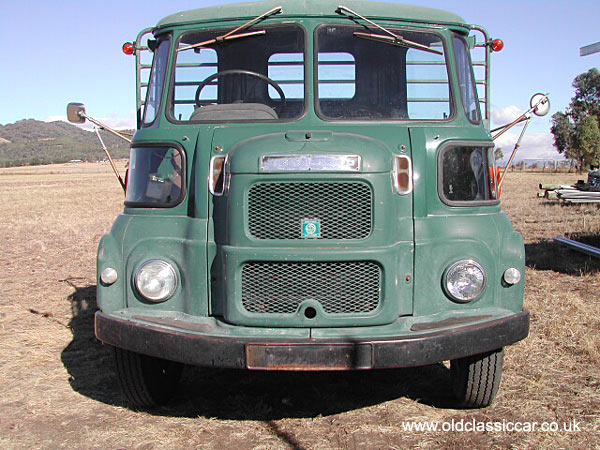
Leyland Fg Lorry Classic Cars Trucks Old Lorries Classic Trucks
Leyland Fg Lorry Classic Cars Trucks Old Lorries Classic Trucks
640×458

Leyland Fg Photo No 14 Of 81 Taken In Australia
Leyland Fg Photo No 14 Of 81 Taken In Australia
600×450

Leyland Fg Photo No 74 Of 81 Taken In Australia
Leyland Fg Photo No 74 Of 81 Taken In Australia
600×450


Leyland Fg Photo No 37 Of 81 Taken In Australia
Leyland Fg Photo No 37 Of 81 Taken In Australia
600×450


Leyland Lorry Photo No 68 Of 81 Taken In Australia
Leyland Lorry Photo No 68 Of 81 Taken In Australia
600×450

Leyland Lorry Photo No 58 Of 81 Taken In Australia
Leyland Lorry Photo No 58 Of 81 Taken In Australia
600×450

Leyland Chassis Cab Photo No 71 Of 81 Taken In Australia
Leyland Chassis Cab Photo No 71 Of 81 Taken In Australia
600×450

Leyland Bmc Fg Flatbed Lorries 1971 Leyland Bmc Fg Flatb Flickr
Leyland Bmc Fg Flatbed Lorries 1971 Leyland Bmc Fg Flatb Flickr
1024×768

Leyland Fg 350 East Midlands Gas Board A Photo On Flickriver
Leyland Fg 350 East Midlands Gas Board A Photo On Flickriver
595×640

Leyland Fg Camiones Clásicos Camiones Clasicos
Leyland Fg Camiones Clásicos Camiones Clasicos
500×333

Leyland Fg Series Artic Unit And Trailer Taken At The Lorry Flickr
Leyland Fg Series Artic Unit And Trailer Taken At The Lorry Flickr
1024×768


Leyland Flatbed Photo No 44 Of 81 Taken In Australia
Leyland Flatbed Photo No 44 Of 81 Taken In Australia
600×450

Leyland Fg Photographed Whilst A Wild Dust Storm Was Rolli Flickr
Leyland Fg Photographed Whilst A Wild Dust Storm Was Rolli Flickr
1024×576
Leyland Fg Reg Ppr 637r Gaydon 2023 Mike S Flickr
Leyland Fg Reg Ppr 637r Gaydon 2023 Mike S Flickr
1024×683

Leyland Lorry Photo No 70 Of 81 Taken In Australia
Leyland Lorry Photo No 70 Of 81 Taken In Australia
600×450

Bmc Leyland Fg Picture Taken At Shaw Vehicle Rally Oldha Neil
Bmc Leyland Fg Picture Taken At Shaw Vehicle Rally Oldha Neil
1024×768


1971 Leyland Fg 550 Lorry London To Brighton Historic Comm Flickr
1971 Leyland Fg 550 Lorry London To Brighton Historic Comm Flickr
1024×769


1981 Leyland Fg 345 Lorry Showing 96000 Miles Drove To The Sale Site
1981 Leyland Fg 345 Lorry Showing 96000 Miles Drove To The Sale Site
2500×1875

Hch532n Leyland Fg Pc Sold As A Caravan At Butterley M Flickr
Hch532n Leyland Fg Pc Sold As A Caravan At Butterley M Flickr
640×444
Leyland Fg Recovery Truck From A Time Before Slide And Tilt Beds Youtube
Leyland Fg Recovery Truck From A Time Before Slide And Tilt Beds Youtube
1000×750

Topworldauto Photos Of Leyland Fg Photo Galleries
Topworldauto Photos Of Leyland Fg Photo Galleries
1024×768


Topworldauto Photos Of Leyland Fg Photo Galleries
Topworldauto Photos Of Leyland Fg Photo Galleries
